
6 Deck Patterns That Save You Money
Decking designs to elevate your outdoor space
A beautiful deck doesn't have to look like every other deck on the block. One of the easiest ways to add visual interest to a decking project is by changing the direction, layout, or combination of your boards.
From simple transition boards to intricate geometric patterns, patterned decking can turn a large, open surface into a defining feature of your outdoor space. It can also be a great way to incorporate shorter decking boards into your design.
Material selection can have just as much impact on the finished deck as the pattern itself. For natural hardwood decking, compare species such as Ipe, Cumaru, Garapa, and Tigerwood, each of which offers its own color, grain, and character. If you prefer a low-maintenance alternative, explore our complete selection of composite decking, including options from TimberTech and Millboard.
Whichever material you choose, use one compatible decking system across the project and confirm its requirements for framing, board spacing, and fastening before selecting a pattern.
Here are six deck patterns to consider for your next project.
1. Transition Board
Difficulty: Easy
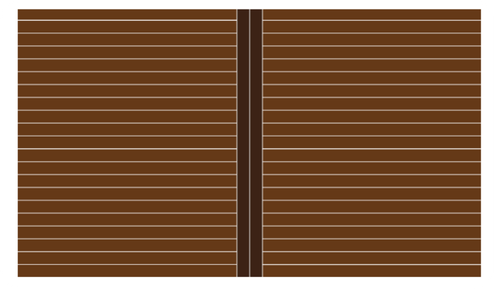
Looking for a simple way to add visual interest? A transition board puts a subtle twist on a traditional decking layout.
By running one or more boards perpendicular to the rest of the deck, you can break up long expanses of straight decking while creating natural separation between different areas of the space. It's also a great opportunity to introduce a different color, species, or stain.
For projects using 16-inch-on-center framing, our guide recommends using two transition boards so you can maintain the framing span without changing it in the middle of the deck.
Design tip: Use a contrasting color from the same decking collection to make the transition boards stand out. On a natural hardwood deck, a pigmented TimberTown ProCoating can create contrast while helping preserve the wood’s color.
2. Picture Frame
Difficulty: Easy
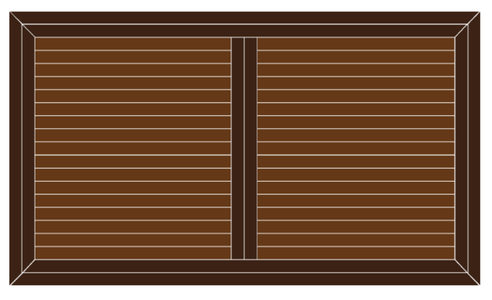
Take the transition board pattern a step further by adding a picture-frame border around the deck.
The picture-frame pattern gives the perimeter a clean, finished appearance while allowing you to create contrast between the border and the interior decking. A different species, color, or stain can make the frame stand out even more.
For the corners, a 45-degree cut creates a polished, finished look. Just remember to provide additional support beneath the joints.
When working with composite decking, check the manufacturer’s requirements for picture framing and exposed board ends. For hardwood decking, account for the species’ natural movement and fastening requirements when planning the perimeter.
Design tip: Pair two transition boards with two picture-frame boards for a more defined border.
3. Patchwork
Difficulty: Moderate
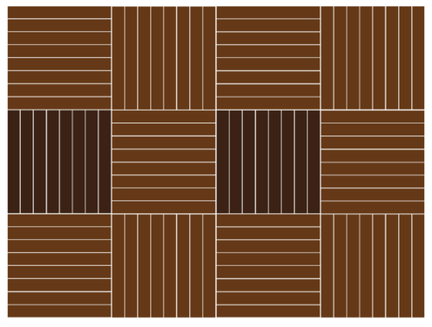
If you're looking for something more creative, the Patchwork pattern offers plenty of possibilities.
An expanded take on classic parquet flooring, this layout divides the deck into smaller sections that create a repeating geometric design. It's particularly effective on larger deck surfaces, where the pattern adds visual interest without relying on one continuous board direction. You can also create contrast by changing the board direction or using coordinating colors from the same decking collection. On a hardwood deck, keeping the same species throughout will help the squares age and move more consistently.
One important consideration: decking board widths can vary between products and species. Before building the framing for your squares, measure your actual decking so the sections can be sized appropriately.
Design tip: Use contrasting squares to create a custom geometric look.
4. Herringbone
Difficulty: Moderate
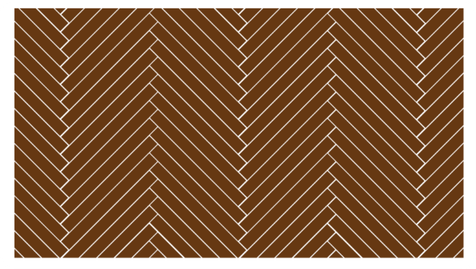
Herringbone is a classic pattern that makes a statement without requiring as many angled cuts as a chevron pattern.
By placing shorter boards at a 45-degree angle, you can create a repeating zigzag pattern that gives your deck a custom, high-end appearance.
Because the boards are installed diagonally, you'll need to account for the framing span. Additional joists at board joints can provide more fastening options and added stability. The fastening method matters too, especially where angled boards meet. Choose deck fasteners approved for your specific hardwood or composite decking product.
When installing, working across the deck one section at a time makes it easier to measure and cut each board accurately.
Design tip: Frame the deck first, then measure and cut each board as you install it for the most consistent fit.
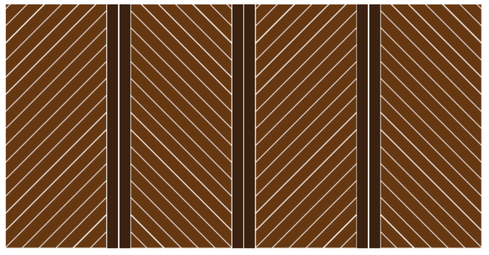
5. Chevron With a Transition Board
Difficulty: Moderate
Chevron decking creates a bold, geometric look, but adding transition boards gives you even more flexibility.
Transition boards allow you to divide the deck into sections and combine different patterns. You can carry the chevron pattern across the entire deck, incorporate straight-laid sections, or use contrasting boards to highlight the transitions.
Transition boards can also create an intentional visual break through color or finish. For composite decks, select coordinating colors from the same product collection. For hardwood decks, use the same species throughout and create contrast with a different coating color.
Because the chevron boards are installed diagonally, the framing will need to accommodate the pattern.
Design tip: Keep the decking material consistent, but use a coordinating color or finish on the transition boards to clearly define each section.
6. The ATX Pattern
Difficulty: Advanced
Ready to take your deck pattern to the next level?
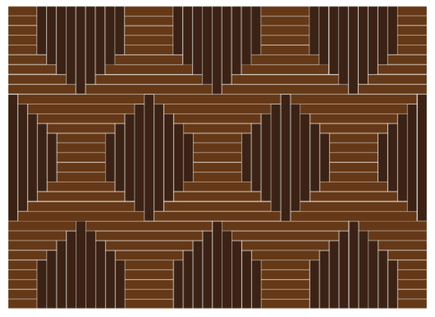
The ATX Pattern was designed by the TimberTown Austin team as a one-of-a-kind layout using shorter boards. Inspired by the eclectic character of Austin, the pattern creates a seamless geometric design that works particularly well across large deck surfaces.
This isn't a beginner project. The framing is heavily dependent on the width of your decking boards, so it's important to measure your actual decking before building the frame.
Material consistency is especially important with this pattern. Use the same decking species or product collection throughout, and verify that every board has the same profile and finished width before laying out the frame. When working with dense hardwoods such as Ipe or Cumaru, plan for the appropriate cutting tools, predrilling, and fastening method.
The pattern really shines on larger decks, where the continuous design has room to make an impact.
Design tip: Use a contrasting species, color, or stain for the center inserts to make the pattern even more distinctive.
Design Beyond the Straight Line
Decking doesn't have to be installed in one direction from one end of the project to the other. With thoughtful planning and the right combination of board directions, species, colors, and patterns, you can transform a standard deck into a custom outdoor space.
Whether you choose a simple transition board, a classic picture frame, or a more intricate herringbone, chevron, or ATX Pattern, patterned decking gives you another way to make your project stand out.
Want to see these patterns in more detail? Download our free 6 Deck Patterns to Elevate Your Outdoor Space guide for pattern layouts, framing examples, and expert tips for planning each design.
Have questions about decking, patterns, or framing? Talk with the TimberTown team about your next project.